

Tips for Visualizing Decor in Space: A How-To Guide
Table of Contents
- Why Visualizing Decor Before You Buy Matters
- Step 1: Take Accurate Room Measurements
- Step 2: Create a Room Layout Plan
- Step 3: Visualize Furniture in a Room Using Digital Tools
- Step 4: Build an Interior Design Mood Board
- Step 5: Use Mirrors and Lighting to Enhance Spatial Perception
- Step 6: Test Before You Commit
- Common Mistakes When Visualizing Your Space
- Frequently Asked Questions
Last Updated: October 9, 2026
Why Visualizing Decor Before You Buy Matters
Buying furniture without understanding how it fits your space is like buying a painting without seeing the wall.
At Che Bella Casa, we work with homeowners who invest in meaningful, artisan-crafted pieces. When you're selecting hand-woven textiles, sculptural ceramics, or made-to-order furniture, visualizing decor in space is essential.
The stakes are higher with luxury pieces. A handcrafted accent table or statement rug represents both financial investment and design intention. Getting it right means a refined, inviting space for years; getting it wrong means expensive mistakes.

This guide walks you through six practical steps to visualize your space before committing to any purchase, from measuring accurately to using digital tools, testing with mock-ups, and avoiding common pitfalls.
Step 1: Take Accurate Room Measurements
You cannot visualize decor in space without knowing your space's actual dimensions. Most people measure carelessly, then wonder why their new sofa looks enormous or their mirror seems too small.
Measure Wall Dimensions and Ceiling Height
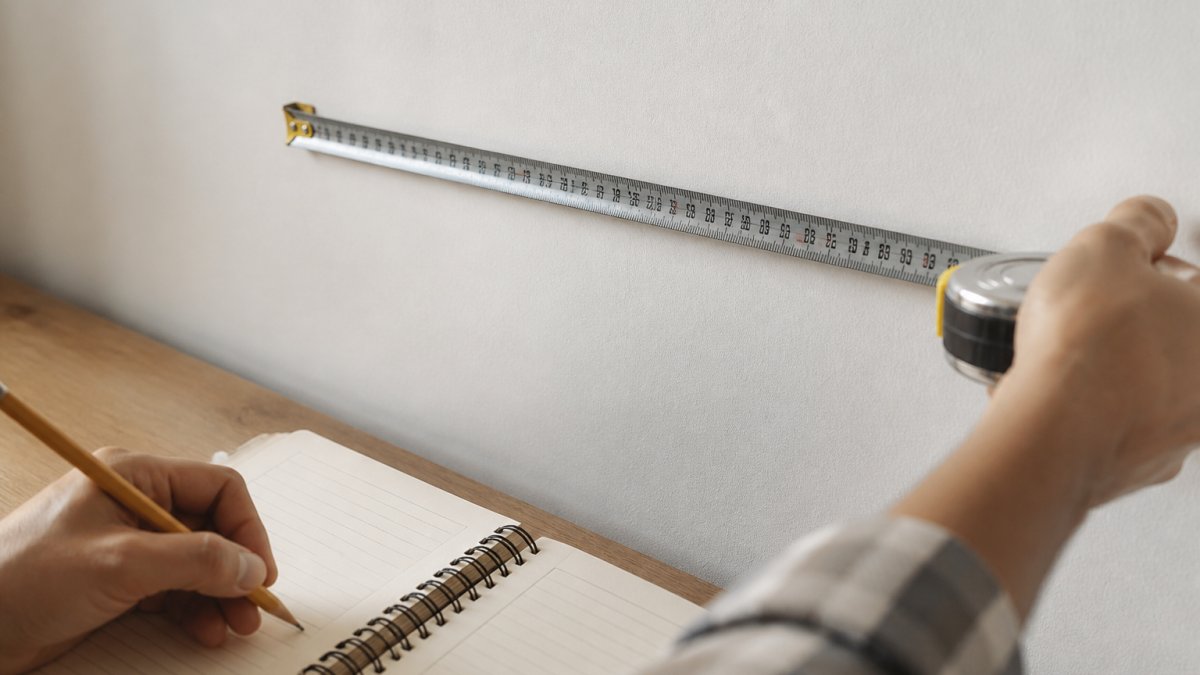
Start with wall length, wall width, and ceiling height. Use a steel measuring tape, not a fabric one, which stretches and gives inaccurate readings.
Measure each wall corner to corner at the base, and record in inches or feet, pick one and stick with it. Measure ceiling height in at least two spots per wall, since ceilings aren't always level and the variation matters for tall furniture or artwork.
Write everything down immediately. Don't rely on memory.
Account for Doorways, Windows, and Architectural Features
Doorways, windows, and built-in features affect traffic patterns, natural light, and where you can place furniture.
Measure each doorway's width and height, and note which way doors swing, this determines whether furniture can sit against that wall. For windows, measure width, height from the floor, and distance from walls to know where curtains or tall pieces won't block light.
Don't forget radiators, outlets, baseboards, or crown molding. These seem minor until you're fitting a console table and realize the outlet is exactly where you wanted to place it.
Create a simple sketch as you measure, mark walls, note dimensions, flag obstacles. It becomes your reference for everything that follows.
Step 2: Create a Room Layout Plan
A floor plan transforms abstract measurements into something visual. It's the foundation for visualizing decor in space effectively.
Sketch Your Floor Plan to Scale
Use graph paper or a simple digital tool, assigning one square to a specific measurement, say, one square equals one foot, and draw your room to scale.
Mark walls, doorways, windows, and architectural features. It's about accuracy, not artistic skill: if your room is 12 by 14 feet, your sketch should reflect that proportion.
Sketch your existing furniture to scale, a 7-foot sofa becomes 7 units on your graph, so you immediately see whether new pieces fit or overwhelm the space.
Don't skip this step because it feels tedious. A scaled floor plan prevents costly mistakes and reveals spatial flow problems that aren't obvious when you're standing in the room.
Map Circulation Routes and Traffic Patterns
Furniture placement is about how people move through the space. Poor circulation makes a room feel cramped and uninviting, even if it's technically spacious.
Identify natural traffic patterns, where people enter and walk to reach other rooms or windows, and mark these paths on your floor plan.
Furniture should frame these routes, not block them: a console table near the entryway guides traffic, while a sofa in the middle creates awkward navigation. Think about movement from doorway to seating area, windows, and exits.
Leave at least 18 inches of clearance for major pathways. This prevents the bottleneck feeling that makes a room uncomfortable, even when it looks fine in photos.
| Planning Element | What to Measure | Why It Matters |
|---|---|---|
| Wall dimensions | Length, width, ceiling height | Determines furniture scale and proportion |
| Doorways | Width, height, swing direction | Affects placement options and traffic flow |
| Windows | Width, height, sill height | Influences lighting and furniture positioning |
| Circulation routes | Pathways from entry to key areas | Ensures comfortable movement through space |
| Architectural features | Outlets, radiators, built-ins | Prevents placement conflicts |
Step 3: Visualize Furniture in a Room Using Digital Tools
Digital tools let you test placement before you buy, making visualizing decor in space interactive and immediate.
AR Apps and Virtual Room Planners
Augmented reality apps like Wayfair's Room Visualizer, IKEA Place, or Houzz let you place a virtual piece in your room via phone camera and see it at actual scale, removing guesswork.
The limitation: most AR apps work best with their own catalog.
Virtual room planners like Floorplanner or RoomSketcher let you upload your floor plan and drag furniture into the layout for a bird's-eye view of spatial flow and balance.
Test different arrangements, move the sofa three feet left, rotate the rug, add a console table. Digital tools make experimentation free and fast, building intuition about what works.
Budget-Friendly DIY Visualization Methods
Low-tech methods work just as well. Cut furniture shapes from cardboard at the same scale as your floor plan, label each piece, and arrange them on your sketch.
Take photos of your empty room from multiple angles, print them, and sketch furniture placement directly on the printouts. This forces you to think about sightlines, focal points, and visual weight more tangibly than digital tools.
Or use painter's tape on the floor to outline furniture footprints, then walk through the space. Does it feel open? Do traffic patterns work? This physical test reveals problems floor plans miss.
These methods cost nothing and engage your spatial intuition more directly than screens.
Step 4: Build an Interior Design Mood Board
A mood board collects visual references that guide your decisions. It prevents impulse purchases that look beautiful in isolation but clash with your overall vision.
Austine Framed Mirror on Stand – Antique Brass Finish →
Gather Visual References for Style and Color
Collect images of rooms that inspire you from Pinterest, Instagram, design magazines, or Che Bella Casa's curated collections. Save at least 20 spaces you love, if a room feels right, save it.
Look for patterns: do your favorites tend toward warm or cool tones, minimal or layered, modern or traditional? Your mood board reveals your actual preferences, not what you think you should like.
Include close-up details, fabric textures, wood finishes, hardware styles, to guide you toward cohesive pieces. A hand-woven textile from Che Bella Casa might feature colors and textures that recur across your mood board.
Test Proportions, Balance, and Focal Points
A mood board is also a testing ground for how elements work together. Print your favorite images and study them.
What draws your eye first in each room? That's the focal point, a fireplace, artwork, or statement furniture piece. Strong rooms have one clear focal point, not five competing elements.
Look at how furniture is arranged around the focal point. Is there balance, or does one side feel heavier?
Notice negative space. Refined rooms have breathing room; empty space is as important as filled space.
Use your mood board to test a new piece: print its image and place it in a printed photo of your room. Does it feel balanced? Does the color work? This simple exercise prevents expensive mistakes.
Step 5: Use Mirrors and Lighting to Enhance Spatial Perception
Mirrors and lighting don't just add function, they reshape how a room feels and are essential for visualizing decor in space at its best.
Mirrors reflect light and create depth: opposite a window they bounce natural light deeper into the room, and on a narrow wall they make the space feel wider. The Austine Framed Mirror on Stand in antique brass finish adds reflection and a warm focal point, and its adjustable stand lets you angle it to capture light where you need it.

Lighting sets mood and reveals color accurately. Warm lighting (2700K) feels intimate; cool lighting (4000K+) feels energizing.
Before committing to a color palette, test it under your actual lighting. That soft gray might look blue under cool overhead lights; a warm beige might feel yellow in afternoon sun.
When visualizing decor in space, account for how mirrors and light transform it: a dark corner becomes a feature with a mirror and small lamp, and a plain wall becomes a focal point with accent lighting.
Step 6: Test Before You Commit
Digital visualization and mood boards reduce risk but aren't foolproof. Physical testing catches problems images miss.
Use Cardboard Cutouts and Mock-Ups
Cut cardboard to the exact dimensions of furniture you're considering, tape it in place, and live with it for a few days. Does it block sightlines? Does traffic flow naturally? Does it overwhelm the space or feel too small?
This sounds crude but is remarkably effective. Cardboard commits you to nothing, move, adjust, or remove it instantly, and reveals problems floor plans and digital tools sometimes miss.
Pay attention to how the mock-up affects natural light: does it cast unexpected shadows or block a window? These details matter more than you might think.
Order Samples and Test in Your Space
For textiles and finishes, order samples directly. Che Bella Casa offers made-to-order pieces, and many artisans provide samples. See how a fabric drapes, feel the texture, and observe the color in your actual light.
Place samples in context: drape a textile over your existing sofa, lean a mirror against the wall where you plan to hang it. Live with them at least a week, your first impression may differ from your feeling after several days.
If a piece isn't right, send it back. Testing before full commitment prevents expensive regrets.
Common Mistakes When Visualizing Your Space
Even with careful planning, certain mistakes derail the process. Knowing them helps you avoid them.
Forgetting vertical space. A tall bookcase might overwhelm low ceilings; a low console table might feel lost under soaring ones.
Underestimating negative space. Refined rooms have breathing room; cramming in every piece you love creates visual chaos.
Neglecting circulation. A beautiful room that's awkward to move through feels uncomfortable. Traffic patterns matter as much as aesthetics.
Testing under wrong lighting. Colors shift dramatically under different light.
Ignoring focal points. Rooms without a clear focal point feel scattered.
Visualizing decor in space before you buy transforms how you shop, preventing costly mistakes and ensuring every piece feels intentional.
Frequently Asked Questions
How can I visualize furniture and decor in my room before purchasing?
Start by measuring your room dimensions and creating a scale floor plan. Use augmented reality apps or virtual room planners to place furniture digitally, or try budget-friendly methods like cardboard cutouts and smartphone photos. Build a mood board with visual references to test how colors, textures, and proportions work together. This multi-step approach helps you see how pieces interact with your space before making expensive purchases.
What measurements do I need to take for accurate room layout planning?
Measure wall length and height, note doorway and window locations, and record ceiling height. Document any architectural features like fireplaces, built-ins, or sloped ceilings. Include the exact width of doorways and hallways to ensure furniture can be moved into the room. These precise measurements are essential for creating an accurate floor plan and preventing costly mistakes when visualizing furniture placement.
Can I use my phone to see how decor will look in my space?
Yes. Many AR apps let you place virtual furniture in your room using your phone's camera. You can also take photos of your space and use design software to overlay furniture images. For a budget approach, photograph your room and print images to test different furniture arrangements. While digital tools provide quick previews, ordering samples or using cardboard mock-ups gives you the most accurate sense of how artisan pieces like hand-woven textiles or ceramic accents will look in person.
How do I know if high-end decor pieces will actually work in my space?
Create a detailed interior design mood board with your existing furniture, lighting, and architectural elements. Test how the piece's color, scale, and material complement your space through photos and digital visualization. Consider ordering samples if available, and check return policies before committing. For luxury items like the Austine Framed Mirror on Stand, its adjustable placement and versatile antique brass finish make it easier to test in different locations before deciding on permanent placement.